

Summertime is all about being outdoors and we all know about grilling burgers, steaks and corn on the cob for dinner, but do we have to come inside for dessert? No way! Let’s stay out around the fire and share something sweet…

S’mores are definitely the quintessential campfire dessert. Graham crackers, melted chocolate and charred marshmallows layered together into sweet and sticky heaven are tough to resist flavor wise, but I have on occasion passed on a s’more due to their general messiness.
Now if you combine those s’mores elements in a cast iron skillet over a campfire, not only do you get to stay clean during the entire process, but you also get to share the deliciousness with you friends.
Let’s get started…

First, let’s talk about the ingredients…
Chocolate and marshmallows are no negotiable. It’s just not a s’more without them, but I am of the belief that the graham cracker component is flexible.
This is technically a dip version of s’mores, so the graham cracker is simply a vessel for transporting the melted chocolate and marshmallow situation. Pretzels, biscotti, cookies and fresh fruit work great here too, so use what you love.

Begin by prepping your source of heat. This skillet can be made over a campfire like we are doing today, but it can also be made over a grill, on a stovetop or in your oven as well. Whatever source you end up going with, you will need medium low heat, so an indirect flame on the fireplace or grill, medium low on your stovetop or about 300 degrees in the oven.
Generously grease the entire interior of a small skillet. The marshmallows can melt over the edges, so be sure to grease them too.

Place the skillet over your heat source and add about 10 ounces of milk chocolate. I also added a 7.6 ounce bag of miniature peanut butter cups. Once I started adding peanut butter to my s’mores skillets, I haven’t stopped. It bulks up the chocolate layer and adds a fabulous layer of flavor that everyone seems to love.

As soon as the chocolate begins to melt down, spread about 12 ounces of marshmallows over the entire skillet.
The amounts on this recipe are flexible. You just want enough chocolate to cover the entire base and enough marshmallows to cover the chocolate. How thick you want these layers is completely up to you!

Once the chocolate is covered by marshmallows, don’t forget about the heat that it is over. You can’t really see the chocolate anymore, so it will be hard to tell if it begins to burn until it is scorched. If your fire begins to get rowdy, slide that skillet off to the side so the marshmallows can soften slowly.
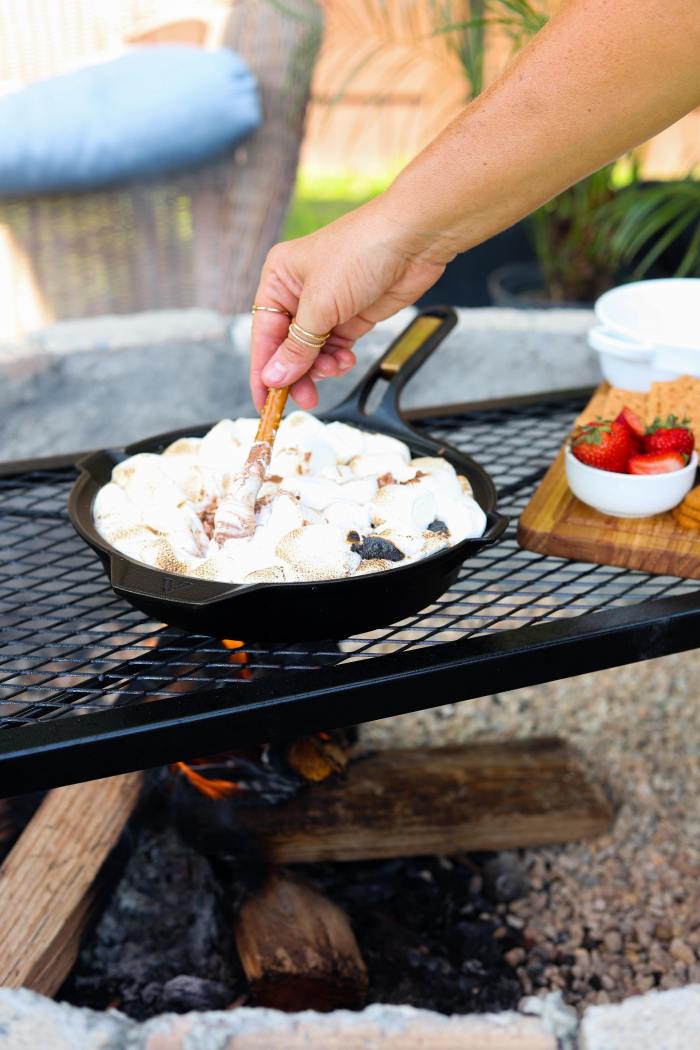
Once the marshmallows have softened, you are technically ready to dig in, but there is something nostalgic about charred marshmallows that I feel needs to be created…
Charring the marshmallows…
-
-
- Chefs torch – using a chefs torch to brûlée the tops of the marshmallows is a great option to create that wonderful charred flavor.
- Broiling – if you are making this skillet indoors, sliding the skillet under your ovens high broil heat for 60-90 seconds will work great too!
- The old fashioned way – as a kid, we put the marshmallows on the edges of a pointy stick and held them over the fire until the turned brown (or burst into flames), but since our marshmallows are nestled in the skillet, we can bring the fire to them by SAFELY lightly the end of a long stick on fire and letting the flame kiss the tops of your marshmallows. This is how my dad loves to do it. Just be ready to blow any little marshmallow fire out should they take off.
-

There is something so special and inviting about the wilted marshmallows kissed with char and the chocolate gently bubbling up from underneath. It’s warm, cozy and nostalgic in all the right ways.
Slide the skillet off of the heat to let things relax just a bit, so you avoid scooping lava hot chocolate into your mouth.
The only thing left to do is to dig in. Use graham crackers, pretzels, cookies or fruit to stir up the melty goodness and enjoy those classic s’mores flavors.


S'mores Campfire Skillet
Ingredients
- non-stick cooking spray
- 10 ounces of milk chocolate
- 7.6 ounces of miniature peanut butter cups (optional)
- 12 ounces of marshmallows
- graham crackers, pretzels, cookies or fruit (for dipping)
Instructions
- Prepare your heat source to create medium low heat. If using a campfire or grill, indirect heat is best. If using a stovetop, set heat to medium low. If using an oven, preheat to 300 degrees.
- Spray a small cast iron skillet generously with non-stick cooking spray
- Add the chocolate and peanut butter cups into the skillet and place over your medium low heat source
- As soon as the chocolate begins to melt, spread the marshmallows over the entire skillet
- As soon as the marshmallows begin to soften, transfer the skillet off of the heat
- Optional: brûlée the marshmallows to slightly char, if desired
- Dip graham crackers, pretzels, cookie or fresh fruit into the melted chocolate and marshmallows

