
I am such a huge fan of toffee. That crisp, sugary crunch is uniquely fabulous and I love adding bits of toffee into cookies, cupcakes and anything else that I can reasonably work a little toffee into the recipe on.

Now although there are some very good store bought toffee options available, you may find yourself inspired to make your own beautifully buttery toffee at home… maybe for a holiday party or as a gift to a very lucky friend?
For such occasions, I would love to walk you through the simple, but incredibly satisfying process of making your own toffee. This butter toffee is crisp, but not rock hard and can be topped with your favorite chocolate, nuts, sprinkles… whatever you love!
Let’s get started…
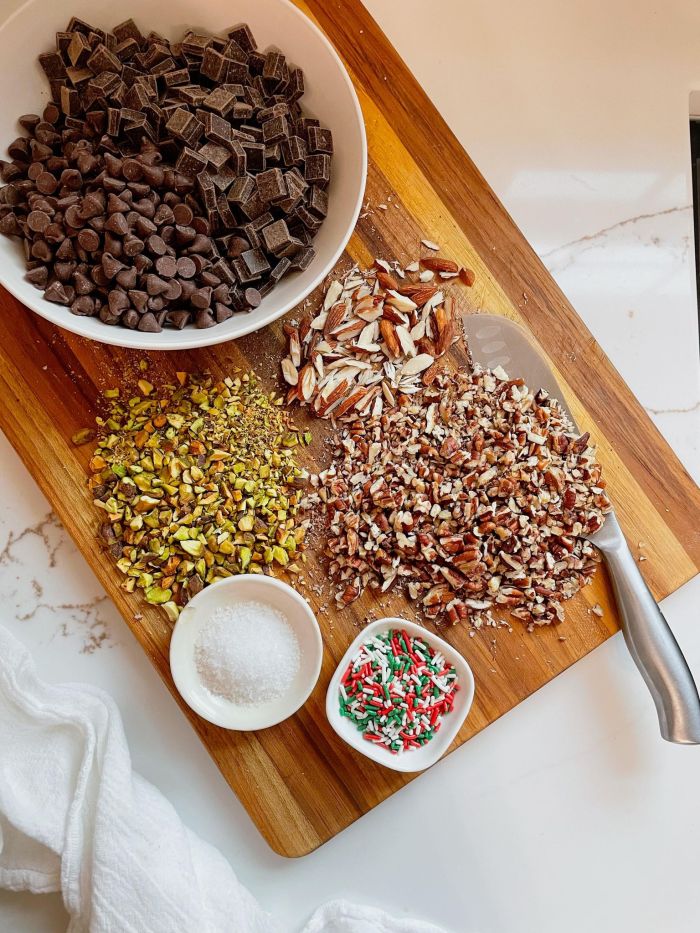
Before you begin making the toffee, gather your toppings. The toffee sets up fairly quickly, so you should definitely have everything ready to go before hand.
Today, I am topping my toffee with a mixture of dark and milk chocolate (16 ounces total) and some chopped nuts. Technically, you do not need to add anything to your toffee, but covering it with chocolate will help seal the toffee and protect its texture.
If you are making this toffee during the holidays or for a special occasion, add some sprinkles!

Begin my adding 16 ounces of salted butter cut into cubes into a medium saucepan along with 2 cups of granulated sugar, 2 tablespoons of light corn syrup, 2 tablespoons of water and 2 teaspoons of vanilla extract. Place the saucepan over medium heat and gently stir as everything begins to melt down and soften.
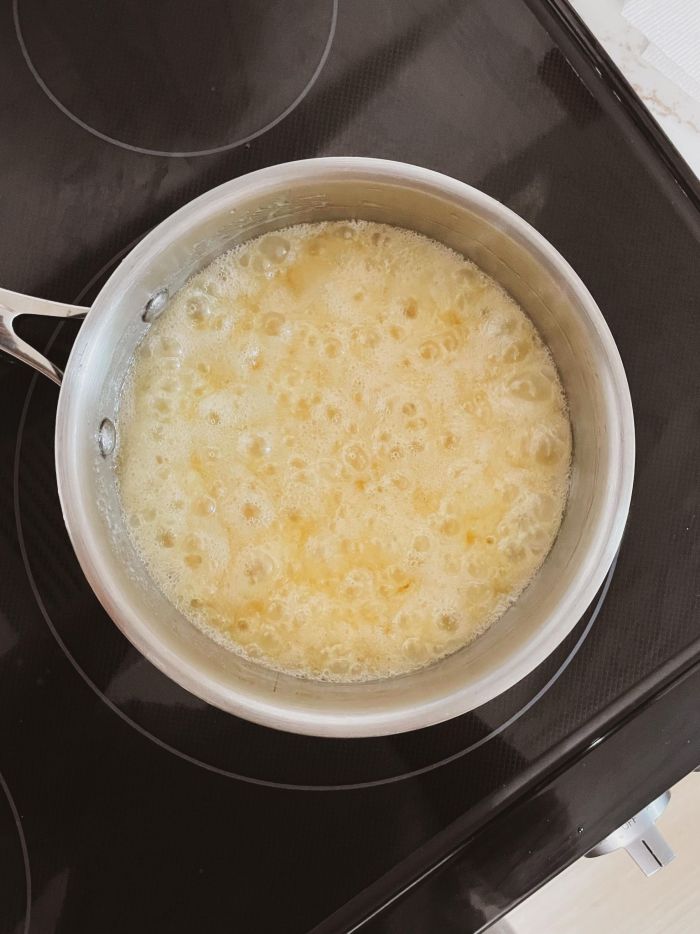
Bring the mixture up to a boil and adjust the stove temperature to maintain a gentle boil. You don’t want to mixture boiling really rapidly, just bubbling like in the photo above.
Stir occasionally to ensure everything is brought up off of the bottom of the saucepan.

Continue boiling the mixture until it has developed a deep golden brown color and has reduced down to a thick syrupy texture. This usually takes about 20 minutes.
In between stirs, butter the sides of an 11″ x 17″ rimmed baking sheet and line the bottom with parchment paper.
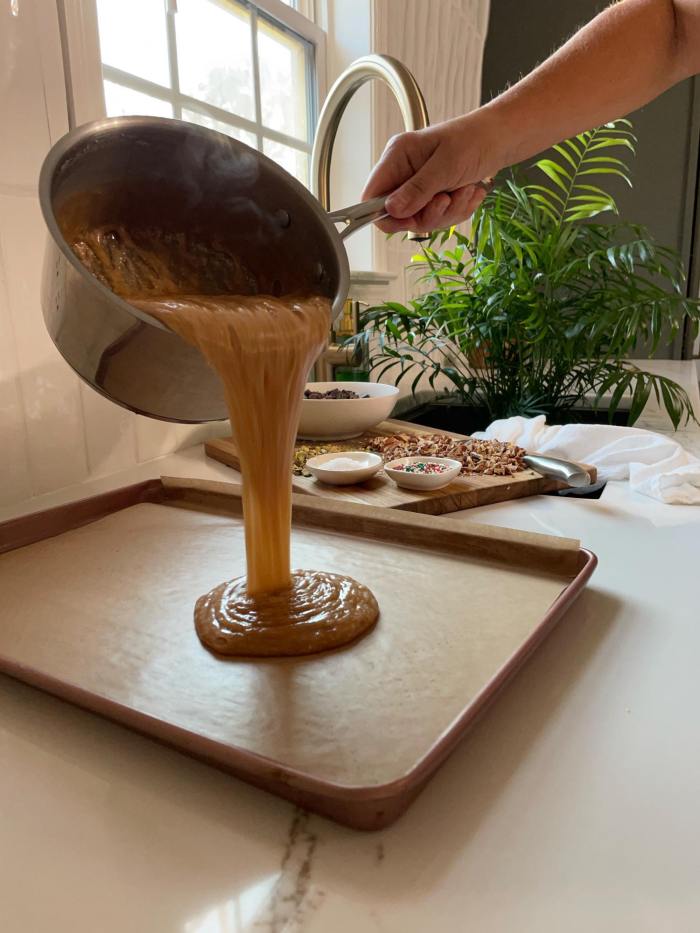
Pour the mixture over the prepared baking sheet and allow it to spread out on it own. You do not need to spread the mixture out with a knife or move the baking sheet, it will spread out as it relaxes. It will not cover the entire baking sheet, but just let it spread where and how it wants.


As soon as you pour the toffee out, sprinkle your chocolate over the entire surface while it is still hot.
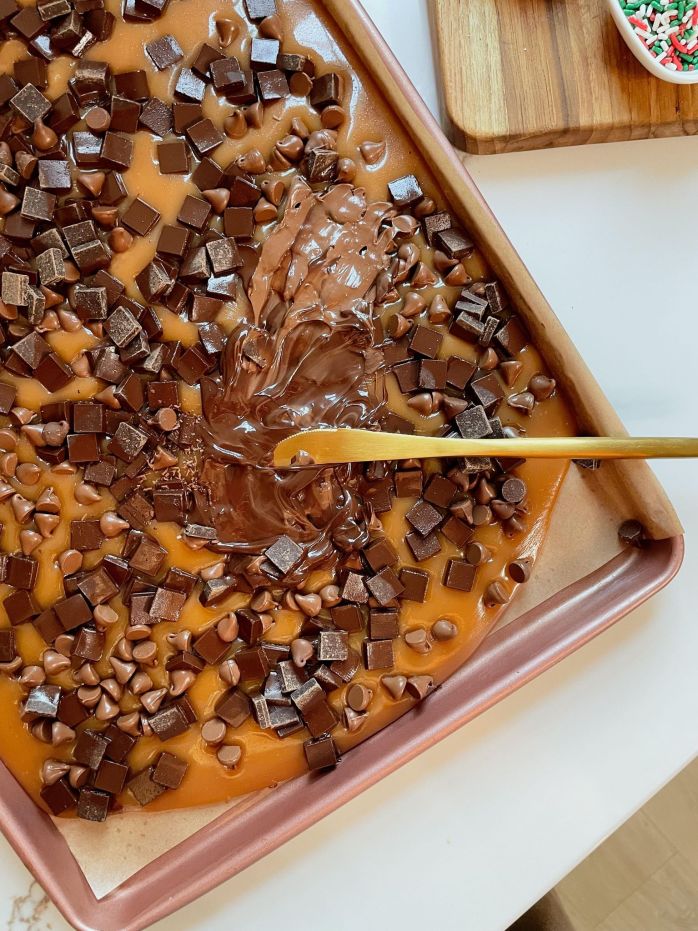
Let the chocolate soften for a minute or so and then careful spread the melting chocolate over the toffee.
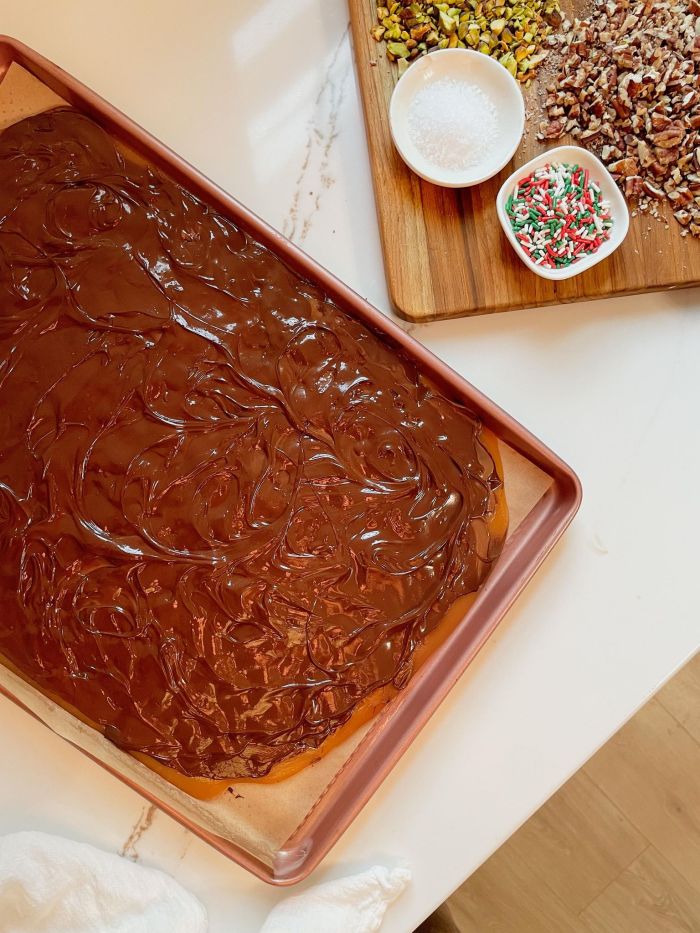
Once the chocolate has been spread evenly, add the chopped nuts before the chocolate begins to set.
Today, I am using some pistachios, almonds and walnuts, but any finely chopped nuts will work great. If you are using unsalted nuts, sprinkle a little sea salt over the toffee to balance everything out.
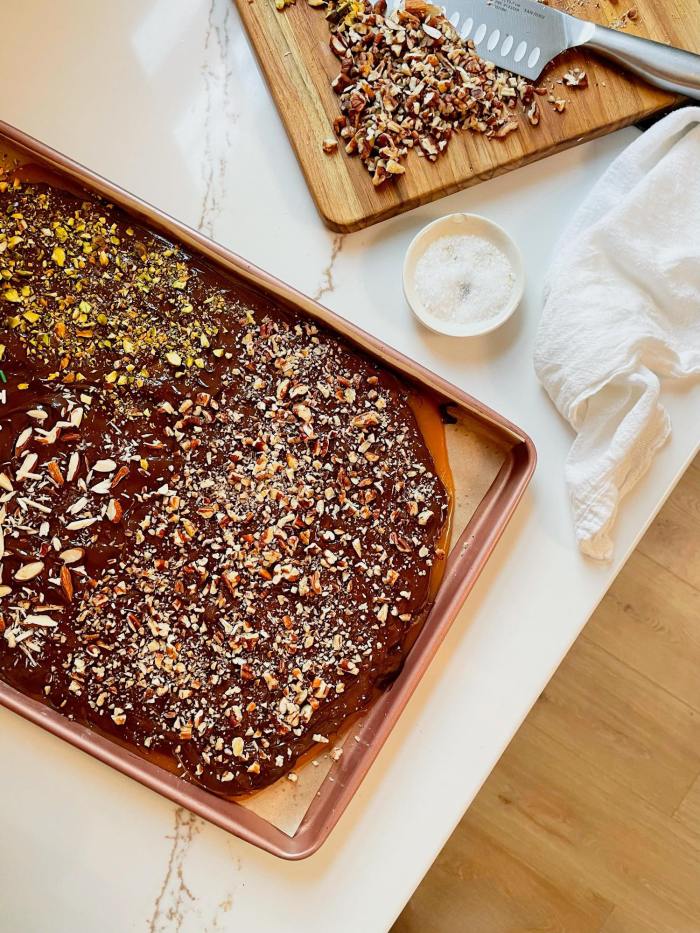
Now that your toffee is all dressed up, it is time to let it set. Some recipes suggest you place the toffee into the refrigerator to set up, but I prefer to let my toffee rest at room temperature until the chocolate it firm and the toffee feels hard and no longer tacky to the touch.
Whether you are chilling the toffee or letting it remain room temperature, lightly cover the baking sheet with foil or a smooth, clean kitchen towel until it is ready to crack…

Once the toffee has hardened, use a corner of the parchment paper to pick it up out of the baking sheet and place it onto your counter top or a large cutting board.
To crack your toffee, you can either pick it up and drop it onto a hard surface or use a sharp knife to pierce the toffee and form cracks.

This toffee is so wonderful! It is crisp, but not rock hard. It has a tiny bit of chewiness, but won’t stick to your teeth, which is something that I love. The way that the chocolate melts in your mouth and the saltiness that the nuts and sea salt adds creates a beautifully balanced flavor and texture that everyone loves.

Toffee makes a wonderful gift and once it hardens, it is easily stored. Simply layer the toffee between sheets of parchment paper to prevent sticking and place them into an airtight container. As long as you keep your toffee in a cool, dry place it will not need to be refrigerated.
Note: If your house is particularly warm or you are making your toffee on a hot summer day, the refrigerator is your friend. Keeping toffee in the refrigerator will help to best maintain its texture.

Toffee is such a beautiful treat that you can make right in your own kitchen with basic ingredients and no special tools or skills required. Plus, it is absolutely delicious and quite customizable too.
Keep this butter toffee recipe in mind next time you want to make something a little extra special. You will be so glad that you did!
Butter Toffee
Ingredients
- 16 ounces of salted butter, cubed
- 2 cups of granulated sugar
- 2 tablespoons of light corn syrup
- 2 tablespoons of water
- 2 teaspoons of vanilla extract
- 16 ounces of chocolate, chips or chopped
- nuts, chopped (optional)
- seas salt (optional)
Instructions
- Prepare an 11”x17” rimmed baking sheet by greasing the sides and lining the bottom with parchment paper
- Combine 16 ounces of cubed salted butter with 2 cups of granulated sugar, 2 tablespoons of light corn syrup, 2 tablespoons of water and 2 teaspoons of vanilla extract in a sauce pan and place over medium heat
- Bring to a boil and then adjust the heat to maintain a gentle boil
- Boil while occasionally stirring until the mixture becomes golden brown and has thickened
- Pour the toffee over the prepared baking sheet
- Sprinkle the chocolate over the entire surface of the hot toffee and let it sit for a minute or so it has a chance to soften
- Spread the chocolate evenly and add your chopped nuts
- Cover the baking sheet with foil or a clean kitchen towel and let the toffee set for about an hour (either at room temperature or in the refrigerator)
- Use the parchment paper to lift the toffee out of the baking sheet and place it onto a hard surface
- Drop the toffee onto a hard surface or pierce it with a sharp knife to form cracks throughout the toffee
- Store layered with parchment paper in an airtight container either in a coolr, dry place or in the refrigerator


