
A good crusty loaf of Italian bread is my version of the ultimate comfort food. With a thin and crispy crust and a soft, buttery texture inside, this beautiful Italian loaf is exactly what I dream about when someone mentions “fresh bread”.

This recipe only requires about an hour of total proofing time and bakes to perfection in under 30 minutes, so you can begin in the late afternoon and have nice warm loaves to go with dinner.
Sounds perfect, right? Let’s get started…

Baking fresh bread is really easy if you follow the recipe and use two of my favorite kitchen tools: a thermometer and a scale. These tools are easy to find and cheap to acquire, but they are important insurance in guaranteeing that your bread will turn out perfect.
Begin by warming 1 3/4 cups of water to around 110 degrees. I recommend using a kitchen thermometer to ensure you have the correct water temperature, but if you do not have one, 100 degrees should feel like a nice warm bath. If the water is too hot, it will kill the yeast, but if it is too cold, the yeast won’t wake up.
Add 1 tablespoon of active dry yeast and 1 tablespoon of granulated sugar into the warm water and set it aside for now. If you work with yeast a lot, you will notice that 1 tablespoon of yeast is a little more than some bread recipes call for. If you are using envelopes of yeast, it will be one envelope plus 3/4 teaspoon.
If you are new to bread baking, the sugar is a little snack to help the yeast wake up. Yeast is in a dormant stage until you “bloom” it or wake it up. Warm water and a little sugar is exactly what it needs to become something wonderful.

While the yeast is blooming, gathering 650 grams of bread flour (approximately 5 1/4 cups), 1 tablespoon of softened butter and 2 teaspoons of salt. This recipe will make two long thin loaves.
You will also need 1 egg white whisked with 1 tablespoon of cold water for a little later in the process, but I like to whisk them together ahead of time and let them hang out in the refrigerator until I need them.

Add about 4 cups of the bread flour into a large bowl and whisk in 2 teaspoons of salt.
Once the yeast has bloomed and the surface is foamy, whisk 1 tablespoon of really soft butter into the yeast and then pour this mixture in with the flour.
Use a silicone or wooden spatula to start working the flour into the yeast mixture until you have a soft dough in the bowl.
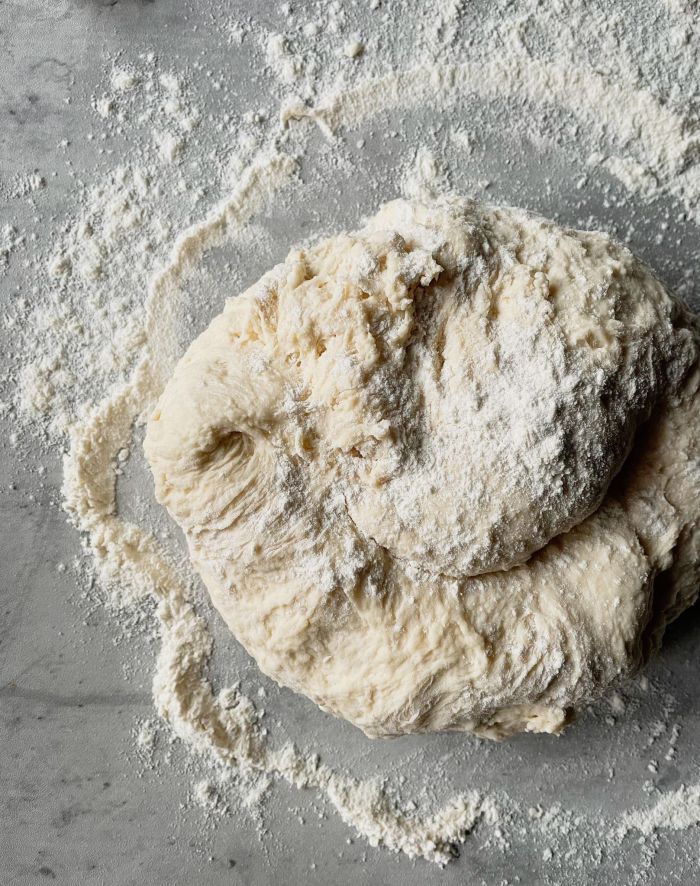
Using some of the remaining bread flour, generously flour your counter top. Transfer the soft dough onto the counter top and sprinkle a little more flour over the top of the dough.
When it comes to kneading this dough, once you have floured your work surface and sprinkled a little over the top of the dough, only add additional flour if the dough is really sticking to your hands. The 650 grams of bread flour that is called for in the recipe is the most flour I have ever needed to bring the dough together, but I will also mention that I have been able to bring the dough together using as little as 540 grams, which is only around 4 1/2 cups. The amount of flour needed is effected by everything from the weather on a given day to the moisture content in your flour and how perfectly you measured your initial 1 3/4 cups of water in the beginning of the recipe, so go by feel more than amount while you are bringing your dough together.
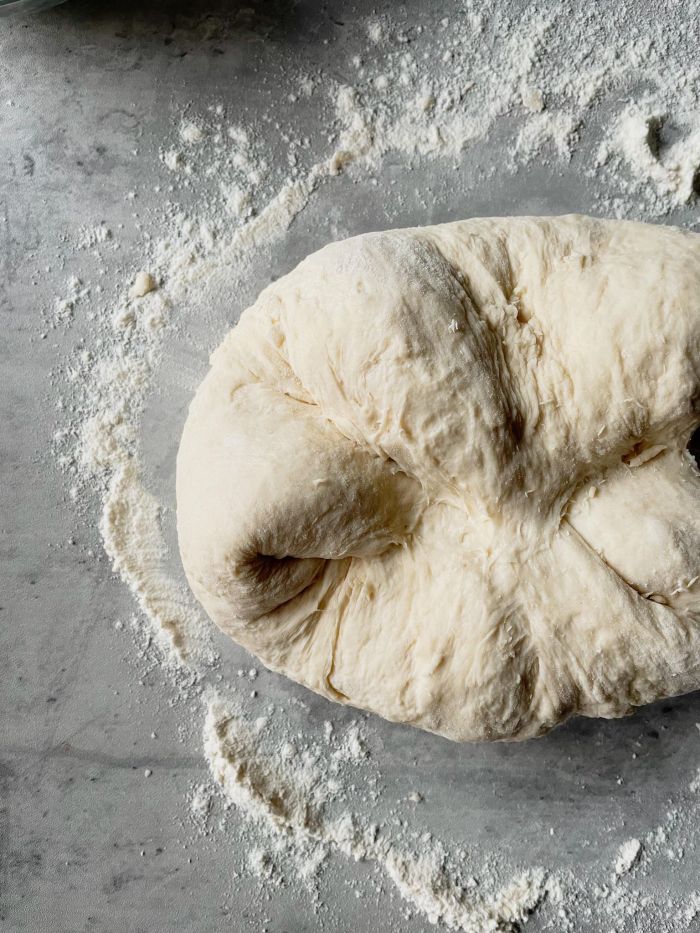
Knead the dough for 5-7 minutes or until it feels soft, smooth and elastic. It is perfectly fine for this dough to be a little tacky, but it should not be super sticky when you are finished. Once it feels soft and a little bit tacky, form it into a round ball and place it into a large lightly oiled bowl and flip it over a few times to coat the entire surface lightly with oil.
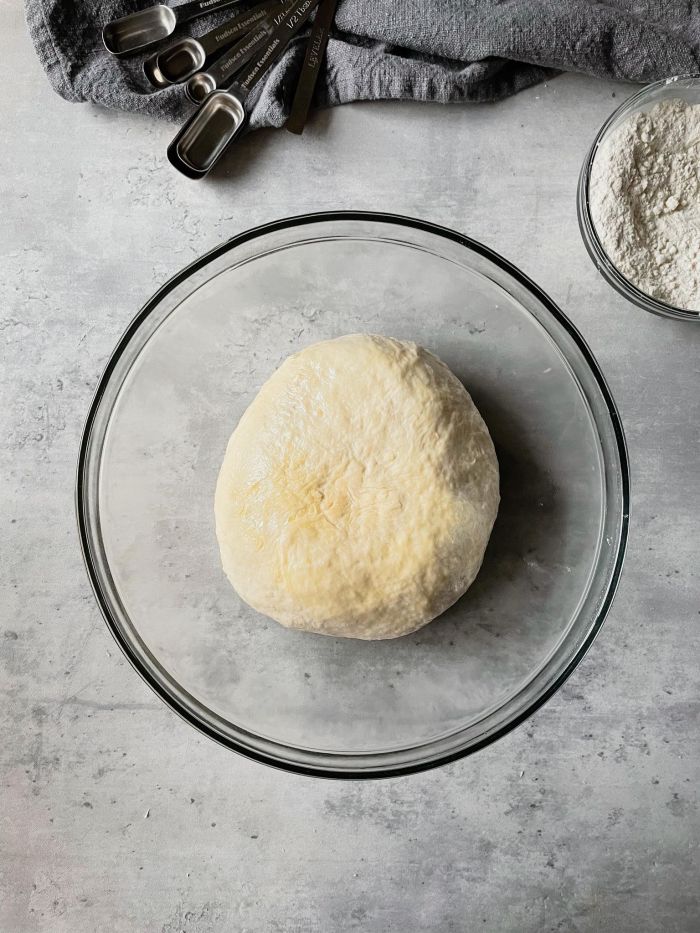
Be sure to use a large bowl for this dough, because it will really puff up as it proofs. Cover the bowl tightly with plastic wrap and let it rest in a warm place for 30-40 minutes. If you house is really warm, it can just hang out on the counter top, but if your house is cold or you are making this bread during the winter, I love tossing a bath towel in the dryer for a few minutes and then wrap it around the bowl to help trap some warmth into the dough.
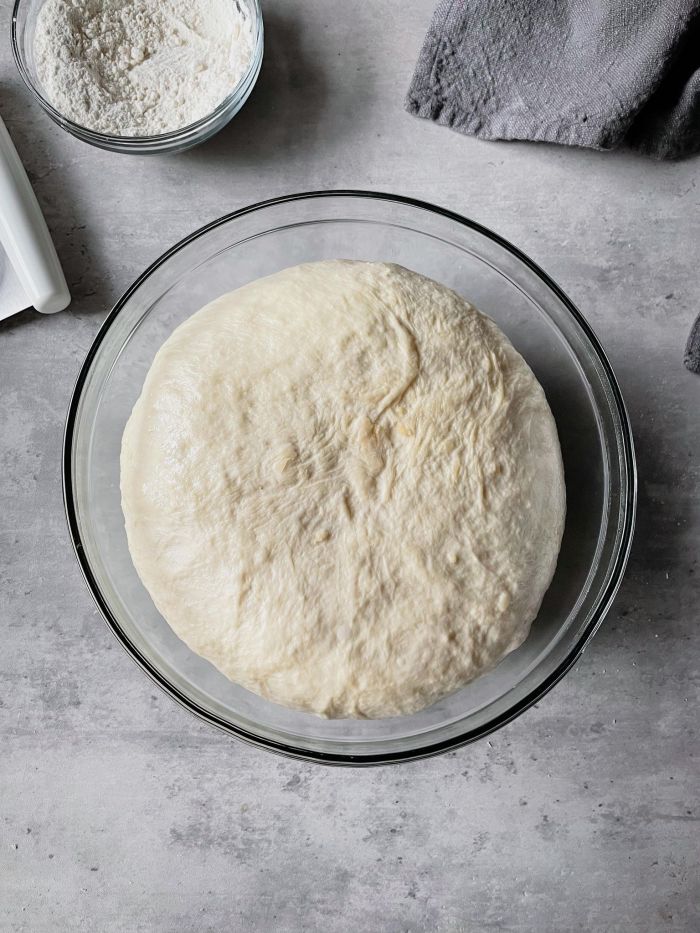
Look at how much it puffed up in just 35 minutes! I love this dough. Lightly flour your surface, flip the dough out onto it and use a sharp knife or bench scraper to divide the dough in half.

Use a floured rolling pin to gently roll the dough out into a long rectangular oval shape (perfection is definitely not required here)…

Starting on one of the long sides and roll the dough up as you would a cinnamon roll. Pinch the seam together and gently tuck the ends under neatly. Repeat this process with the second portion of dough…
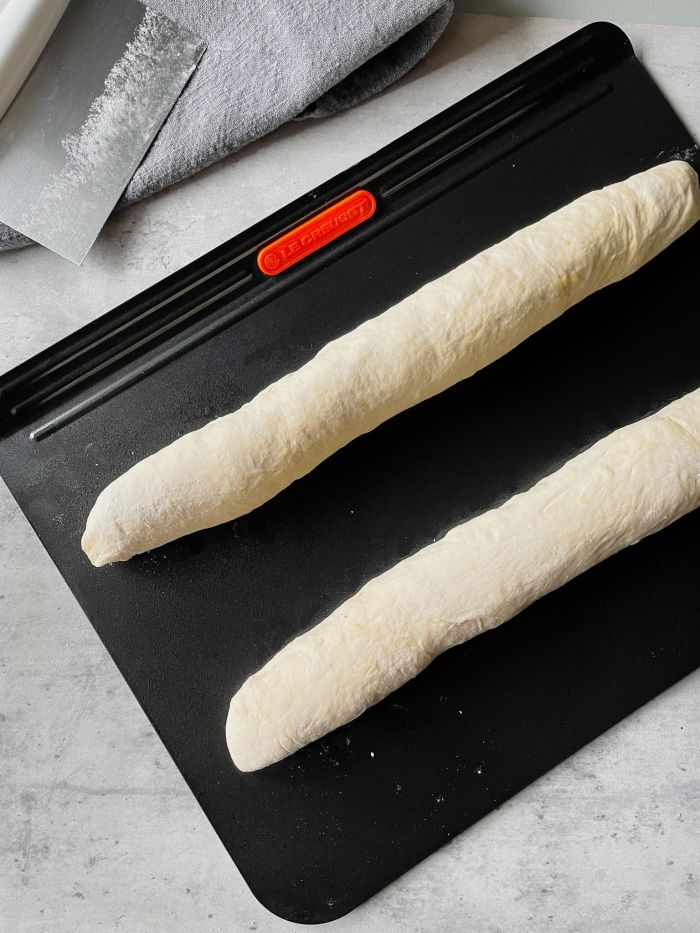
Lightly oil a flat baking sheet with about a tablespoon of olive oil. Transfer the loaves seam side down onto the baking sheet and cover them with a thin kitchen towel.
Let the loaves rest for 20 minutes while you preheat your oven to 425 degrees.
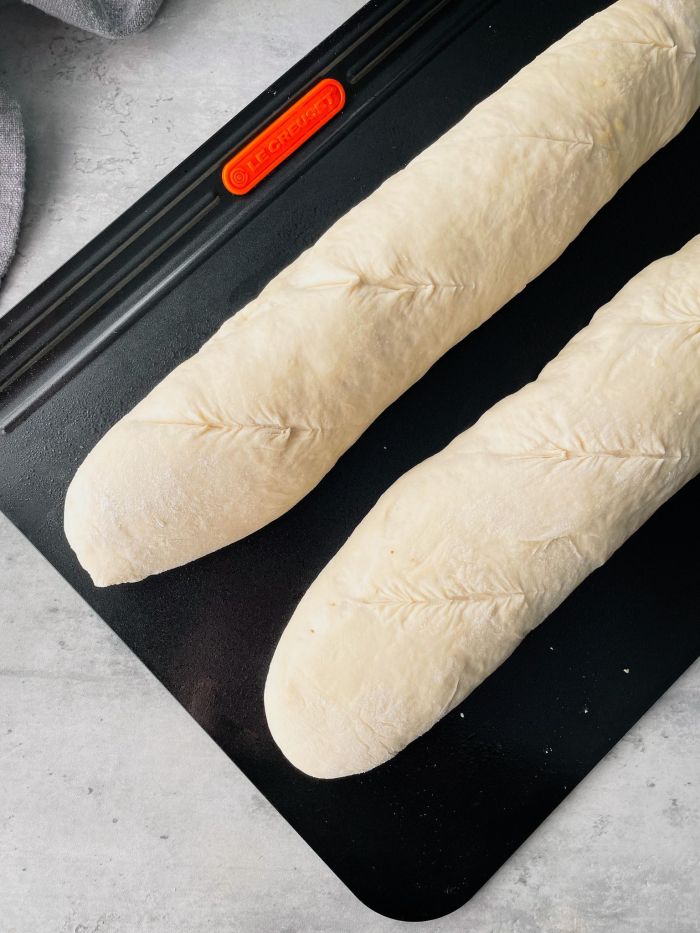
Look at how much the dough has puffed up in just 20 minutes! This is the product of both the tablespoon of yeast being bloomed properly and the right amount of flour being kneaded into the dough. It is a beautiful thing.
Use a very sharp knife or bread lame to cut 4 little slashes across the top of each loaf, like in the photo above. This helps to control where the loaves with split resulting in a beautiful appearance after baking.

Bake the loaves in a 425 degree oven for 20 minutes and while they are in the oven, grab your egg white and water mixture and place a cutting board somewhere close by the oven.
When the 20 minute timer goes off, quickly pull the loaves out of the oven (shut the oven door to keep the heat inside) and brush the entire top surface with the egg whites and water and then transfer them back into the oven.

Bake the loaves for another 5-7 minutes in the 425 degree oven and then transfer them back onto the cutting board to rest for at least 20 minutes.
The egg white mixture added helps to create a beautifully thin, but crispy crust over these loaves. The inside of them is incredibly soft and squishy though…
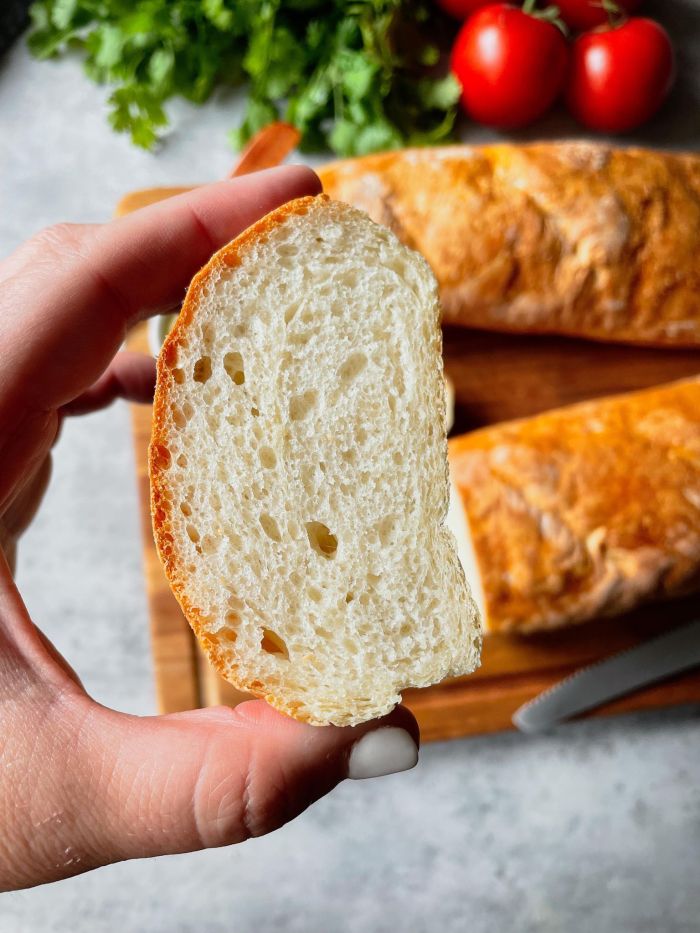
The 20 minutes of resting time that I recommend after pulling these loaves out of the oven is a little annoying, but an important part of maintaining this breads beautifully tender interior. Similar to the reason a steak needs to rest before slicing into it, freshly baked bread has moisture trapped inside of it and this moisture needs a little time to evenly distribute throughout the warm loaf. If you interrupt this process, you will have a loaf with some moist gummy areas and some dry spots, so not deliciously soft.
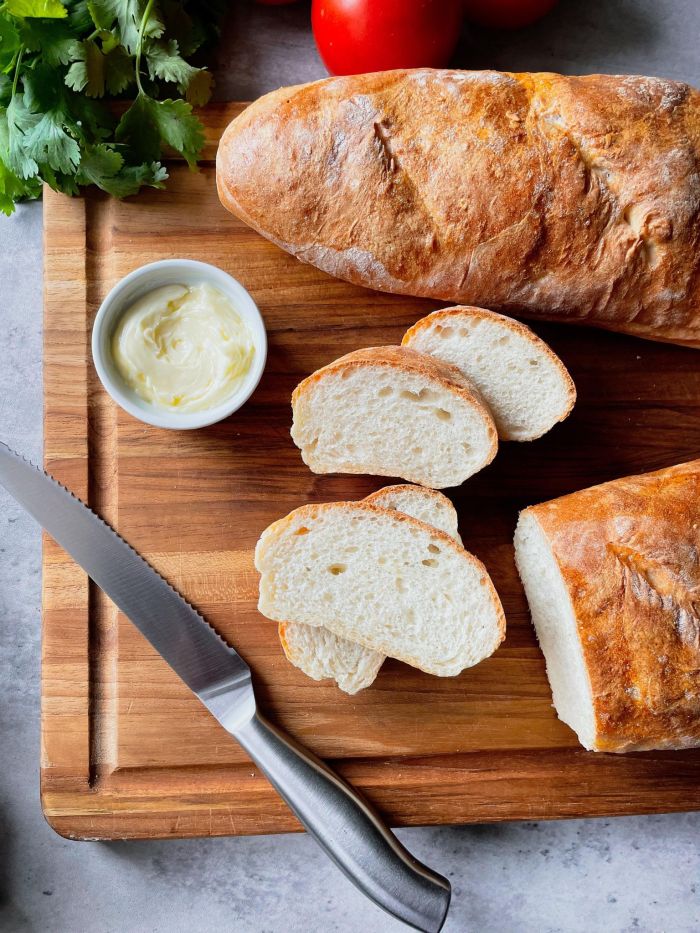
Once your loaves have rested, cut a few slices and enjoy a truly soft and buttery Italian bread.
This bread is almost always enjoyed with softened butter along side a big bowl of pasta or a large salad in my house, but it also makes amazing croutons, french toast and bread pudding too.

Once you see how simple and wonderful this crusty Italian bread is to create in your own kitchen, I am quite confident that you will begin repeating the process over and over again.
Buon appetito!
Crusty Italian Bread
Ingredients
- 650 grams of bread flour (approximately 5 1/4 cups)
- 1 3/4 cups of water, warm (between 100-110 degrees)
- 1 tablespoon of granulated sugar
- 1 tablespoon of active dry yeast
- 1 tablespoon of butter, room temperature
- 2 teaspoons of salt
- 1 egg white
- 1 tablespoon of water, chilled
- 1 tablespoon of extra virgin olive oil
Instructions
- In a small bowl, whisk 1 tablespoon of granulated sugar and 1 tablespoon of active dry yeast into 1 3/4 cups of warm water (110 degrees) and let it sit for about 5 minutes or until it becomes frothy
- In a large bowl, whisk about 4 cups of the bread flour with 2 teaspoons of salt
- Once the yeast is bloomed and foamy, whisk in 1 tablespoon of very soft butter and add this mixture to the flour mixture
- Use a spatula to bring the flour and yeast mixture together until a soft dough begins to form
- Using some of the remaining flour, generously flour your counter or cutting board
- Transfer the soft dough onto the flour surface and sprinkle a little more flour over the top of the dough
- Knead for 5-7 minutes, adding additional flour only if the dough is really sticky
- Once the dough feels smooth and is tacky, but no longer sticky, form it into a ball and place it into a large bowl greased with olive oil
- Flip the dough over once or twice so that the entire surface is lightly coated in olive oil
- Cover the bowl tightly with plastic wrap and let it rest in a warm place for 30-40 minutes
- Transfer the dough onto a floured surface and divide it into two equal portions
- Roll each portion into a large rectangle and then roll the rectangle into a long cylinder
- Pinch the seams together and tuck the ends of the dough under neatly
- Grease a baking sheet lightly with olive oil
- Transfer the two formed loaves seam side down onto the prepared baking sheet and cover with a clean kitchen towel
- Let the loaves rest for 20 minutes in a warm place
- Preheat your oven to 425 degrees
- Once the loaves are rested and puffy, use a very sharp knife to slice 4 marks across the top of each loaf (photos above)
- Bake the loaves in a 425 degree oven for 20 minutes
- Whisk together 1 egg white and 1 tablespoon of cold water and once the loaves have baked for 20 minutes, quickly remove them from the oven and brush them with the egg wash
- Return the loaves to a 425 degree oven and bake for an additional 5-7 minutes
- Transfer the baking sheet onto a heat proof surface to allow the loaves to cool for at least 20 minutes before slicing
- Store leftover loaves wrapped tightly in foil at room temperature


