Have you ever made bread from scratch? So many people want to, but don’t because they are either nervous to work with yeast, are not confident kneading or just worried that their bread won’t turn out great… but, I am here to put your mind at ease and maybe even talk you into trying your first loaf.
Baking the most delicious fresh bread is something that everyone can do and there are plenty of super simple bread recipes to help gently ease you into your bread baking journey. Once you have success with your first few loaves, you may start venturing out into some more challenging recipes and before you know it, your kitchen will smell like fresh baked bread every weekend!

The most important thing you can do when making bread is to follow the recipe closely…
Tip #1. Follow Instructions Closely
Although there are plenty of recipes that you can wing, bread is not one of them. Both the amounts of the ingredients and the order that they are combined are very important. Baking bread is a science and many people do not have success simply because they didn’t follow the instructions. This is an easily avoidable pitfall that will make a huge difference in the taste, texture and consistency of your loaves.
Print off your recipe, grab a pen and follow the steps in order and you will be well on your way to baking one fabulous loaf!
Weigh your ingredients to be sure that you are adding the correct amounts…
Tip #2. Weigh Your Ingredients
Weighing your ingredients may seem unnecessary, especially if a recipe gives very specific amounts, but let me explain why I consider this a non-negotiable element in successful bread baking.
If a recipe calls for 4 cups of all purpose flour, how are you going to measure this amount? You could grab a measuring cup and scoop the flour out directly from the container, you might pour the flour into your measuring cup or use a spoon to scoop the flour out of the container and into your measuring cup. These are three common ways of “measuring” cups of flour and each one will give you a different amount.
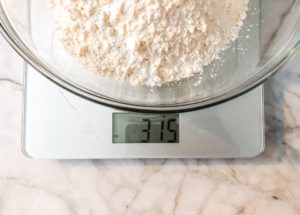
Even though your 1 cup measuring cup may be filled and leveled off, the way that you filled that cup creates different degrees of compaction within each cup. If your flour container is really packed and you dragged your cup into it until it was full, that cup of flour will be much heavier than if you had spooned fluffy flour off of the top of a container into your measuring cup. Researchers have found that there can be up to a 20% difference in the weights of a fluffy cup of flour vs a compacted cup of flour and when you think about a recipe calling for 4 or more cups, this can easily be the difference between light, fluffy bread and a really dense loaf.
This is the scale I use and love: Ozeri Digital Kitchen Scale
So, what do you do if a recipe does not give the weight amounts or you are all ready to bake something now, but you don’t have a kitchen scale quite yet? The most accurate way of measuring by volume (vs by weight) is to fluff up your ingredient (flour, sugar, yeast... etc.) and use a spoon to fill the measuring cup heaping. Then take the back of a butter knife or a leveler and scrape the top of the cup level.
Give your yeast a snack and a warm place to rest…
Tip #3. Blooming Your Yeast
Yeast needs two things to develop into something wonderful… a snack and a warm bath (the same goes for me). Yeast feeds off of sugar, so you will notice that most bread recipes call for yeast to be “bloomed” in warm water or milk with a bit of sugar. Sugar will wake the yeast up and help it grow.
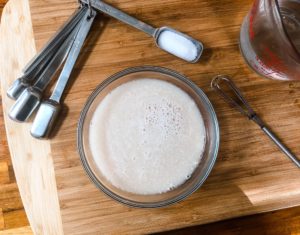
In addition to some sugar, yeast needs warm water and a warm location to do its thing. The water temperature should be around 110 degrees, which will feel like warm bath water. Be sure that the water is just warm, not too hot and definitely not cold. Hot water will kill the yeast and cold water will keep it dormant. I recommend using a thermometer to be sure. Once you combine the amount of warm water, sugar and yeast that your recipe calls for, set it somewhere warm and let it bloom.
If you are unfamiliar with the term “bloom”, it simply means to activate. So, bloomed yeast is awake and ready to go to work. You will know that your yeast is bloomed when the surface has become foamy, frothy and bubbly, plus it should smell really good! Yeast typically takes 5-7 minutes to bloom, but it can take as long as 15 minutes in a cool room. If your yeast has not become foamy and bubbly within 15 minutes, it has most likely expired and you will need to start again. Yeast that has not bloomed will not make your bread dough rise, so toss it and start again.
There are three common types of yeast: active dry, instant and fresh. Most bread recipes call for active dry yeast, but I do have a few on my list that call for instant yeast, so I always keep both on hand. If you have a recipe that calls for fresh yeast, you can usually find it in the dairy or refrigerated deli section of your grocery store.
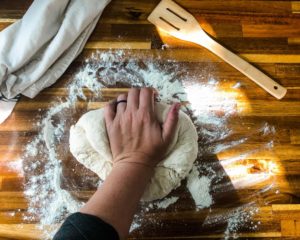
Kneading dough ensures everything is combined and ready to become something delicious…
Tip #4. Kneading The Dough
Kneading is fun. I find it really relaxing, but I absolutely remember a time when I felt overwhelmed when reading something like “knead the dough until it feels elastic”. How do I know that I kneaded it enough? How elastic should it be? What will happen if I under or over knead my dough?
Well, there is no “knead” to stress about it… I’m sorry… but, seriously, kneading skills are something that you develop over time. I like to add kneading times to a lot of my recipes, but here are some other things you want to look for while you knead…
- Be sure that all of the ingredients look fully combined in your dough (unless the recipe specifically says otherwise). As you knead, push the dough across a floured table or counter top and pull a corner out and back over the middle. When you “open” the dough, make sure you don’t see any chunks of flour, really wet or dry spots. If you do, keep kneading until everything comes together.
- “Elastic” dough will retract or spring back after being stretched or press out. This is proof that you have activated the strands of gluten in the dough and this is a good thing.
- If you think your dough has been kneaded enough, tuck it into a ball and gently poke it with your finger. If it springs back, you are good to move onto the next step…
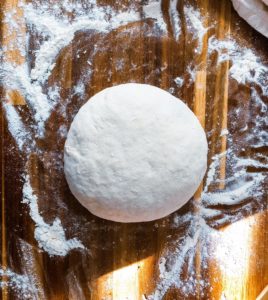
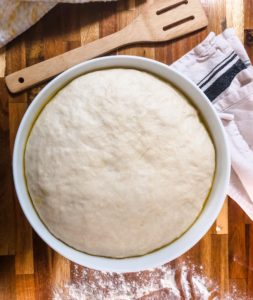
Bread dough needs a long, warm nap before it is ready to bake…
Tip #5. Proofing Your Dough
Different types of bread require different proofing times, but most breads will require at least one proof in a nice warm place. My go to proofing set up is a large glass bowl lightly greased with olive oil tightly covered with plastic wrap and then a large kitchen towel. Once this is all set up, you have several options for the location. If your house is warm, you can just set it on the counter top or in some sunlight coming in from a window. If your house is a little chilly, you can set it in the microwave (turned off, of course). If your house is really cold, you can pop a bath towel in the dryer for a few minutes and then wrap it around the bowl or set it in the oven with the power off and the internal light turned on.
During the proofing phase you are looking for the dough to double in size before moving to the next step. This happens when the flour, water, yeast and sugar react together causing the flour to break down into a simple sugar, the yeast feasts on this sugar and releases air bubbles out into the dough. The gluten we formed during kneading holds onto these air bubbles developing a dough that is puffy and light.
I love covering the bowl with a little ball of dough inside and then uncovering it later to see the bowl full of light, puffy dough. It’s the little things in life.

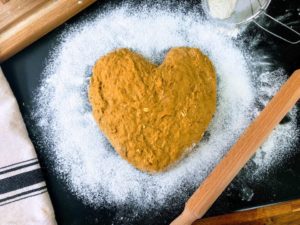
Shaping your bread before the second proof…
Tip #6. Shaping Your Bread
Once your bread dough is all puffy and airy, you will need to shape it before it goes down for a second nap. Typically, you will transfer the dough onto a floured surface and divide it into portions. Whether you are dividing your dough in two to make two separate loaves or dividing it into three, four or five long ropes to braid together for a beautiful braided challah or dividing it into many portions to make burger buns, english muffins or bread sticks, shaping the dough into a round disk and then dividing it with a sharp knife is the easiest way to see how even your portions are. If you have a kitchen scale, weighing each portion is the most consistent way to achieve evenly sized buns or muffins.
Once the portions are shaped into whatever they will eventually become, they are typically transferred onto a parchment line baking sheet or a baking sheet that has been dusted with cornmeal. Cover the shaped dough with a clean kitchen towel and return the dough to its warm napping place until the portions have puffed up.
This is a common second proofing situation, but each recipe should give you directions for how each proof should be worked out.
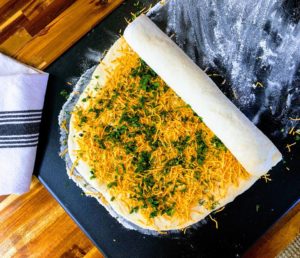
Filling loaves with something fabulous…
Tip #7. Add Filling To Your Loaves
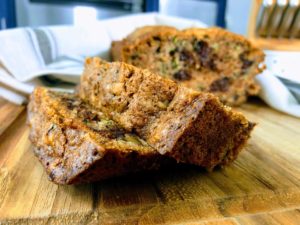
One of the easiest ways to add flavor to bread is by adding some delicious filling into the dough. Just like you would add a sweet filling into cinnamon rolls, you can add cheese, fresh herbs, garlic… anything you want into your bread dough.
Check out my Cheddar & Herb Braided Bread recipe for a buttery loaf full of sharp cheddar and fresh herbs or this Pumpkin Spice Brioche recipe for a slightly sweet, super flavorful pumpkin flavored brioche or this Double Chocolate Braided Bread recipe for a rich, sweet dessert bread with loads of chocolate flavor braided into the loaf.
There are many options! As long as you start with a great basic bread dough, you can play with your add ins to create your own custom loaves!
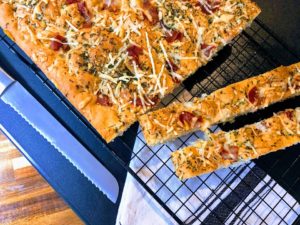
Toppings, egg wash and glazes just before baking…
Tip #8. Finishing Your Loaf
Once your bread dough has proofed, been shaped, risen fully and your oven is preheated, it is time to do your final preparations. An egg wash is the most common way to finish a loaf before baking. An egg wash is a simple combination of 1 egg and 1 teaspoon of water or milk whisked together and then brushed over the surface of the dough right before it goes into the oven. This is what gives your crust that beautiful golden color.
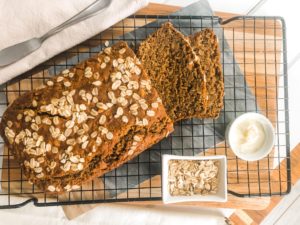
An egg wash is not the only way to top a loaf though! You can sprinkle freshly grated cheese or herbs over a loaf of focaccia or sprinkle a multigrain loaf with extra grains, seeds and oats or sprinkle some flaky sea salt over some brioche right before it goes in to bake to golden perfection.
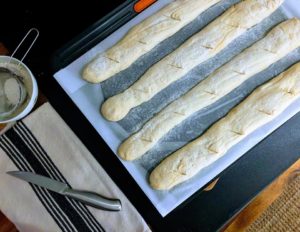
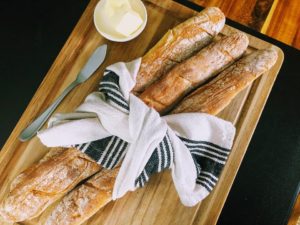
Some loaves will require scoring prior to baking. Scoring is done by slicing little hash marks into the top of a loaf to allow the bread to expand at these points during the baking process. You can score your bread with a very sharp knife, but if you end up becoming a serious bread baker, you may want to invest in a “lame”. A lame is a thin, super sharp razor made specifically for scoring bread. You can find bread lames on Amazon or super cute ones on Etsy (like this one!). Classically, loaves requiring scoring are simply cut every few inches, like the baguettes on the left, but if you are interested in checking out some gorgeous loaves, google “scoring bread” and you will be in awe of what you can do with a loaf!
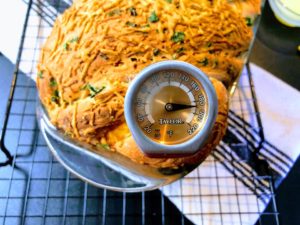
How can you tell when your bread is fully baked?
Tip #9. Bread Temperatures
A foolproof way to determine that your bread is fully baked is my taking its internal temperature with a food thermometer. Here are the optimal temperatures for common types of bread…
- Classic yeast breads – 190°F degrees
- Rye breads – 205°F degrees
- Gluten Free breads – 205° degrees
- Bread doughs containing eggs – 210° degrees
As soon as you think your bread is done, test the temperature and as soon as it reaches the optimal temperature, remove it from the oven. Continuing to bake a loaf past its optimal temperature can result in a dry loaf, so pop it out of the oven as soon as it is done!
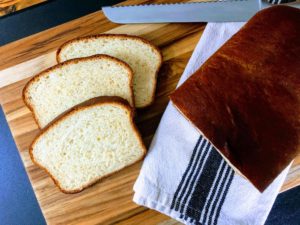
Caring for your freshly baked loaf…
Tip #10. Resting Your Bread
The absolute toughest part about baking bread is waiting for it to cool after it comes out of the oven. It looks so beautiful and smells fantastic, but you must exercise patience when baking certain types of bread. Why do we have to do this? Starch retrogradation is taking place, thats why! Ya know how we are supposed to rest meat after cooking, so the juices can redistribute before we slice it up? Well, a similar situation goes on inside a freshly baked loaf. During the baking process, the starch molecules within a loaf absorb water and once the bread is fully baked, that moisture needs to redistribute back into the bread over time to create evenly soft bread. If you cut into the bread while this process is happening, you can disrupt the process and your bread can be gummy and odd in texture. A loaf cut into too early can even look under baked!
So let it rest before slicing… you can do it…
If you are looking for a simple bread recipe to get started, this Dutch Oven Bread recipe one doesn’t even require kneading! You could also start with this Guinness Beer Bread that requires no kneading or proofing! If you have any questions about any element of baking bread, feel free to comment below and ask away!
I hope these tips for baking great bread right in your own kitchen gives you the confidence to break out your bread pans, get one of those cute bread lames and get to baking some fabulous loaves of buttery goodness!
Happy bread baking everyone!